
Have you ever walked into a Ready Mix Concrete (RMC) plant and wondered where to start your audit? If you’re a fresh QA/QC engineer or site engineer, the first audit can feel overwhelming. You may know the theory, but applying it on-site is a different challenge.
The good news is that every successful audit follows a logical process. Once you understand that process, the task becomes much easier.
This guide explains the RMC plant audit in the same order followed by experienced QA/QC engineers. Instead of listing inspection points, it shows you what to check, why it matters, and how to identify problems. By the end, you’ll have the confidence to perform a structured audit and record meaningful observations.
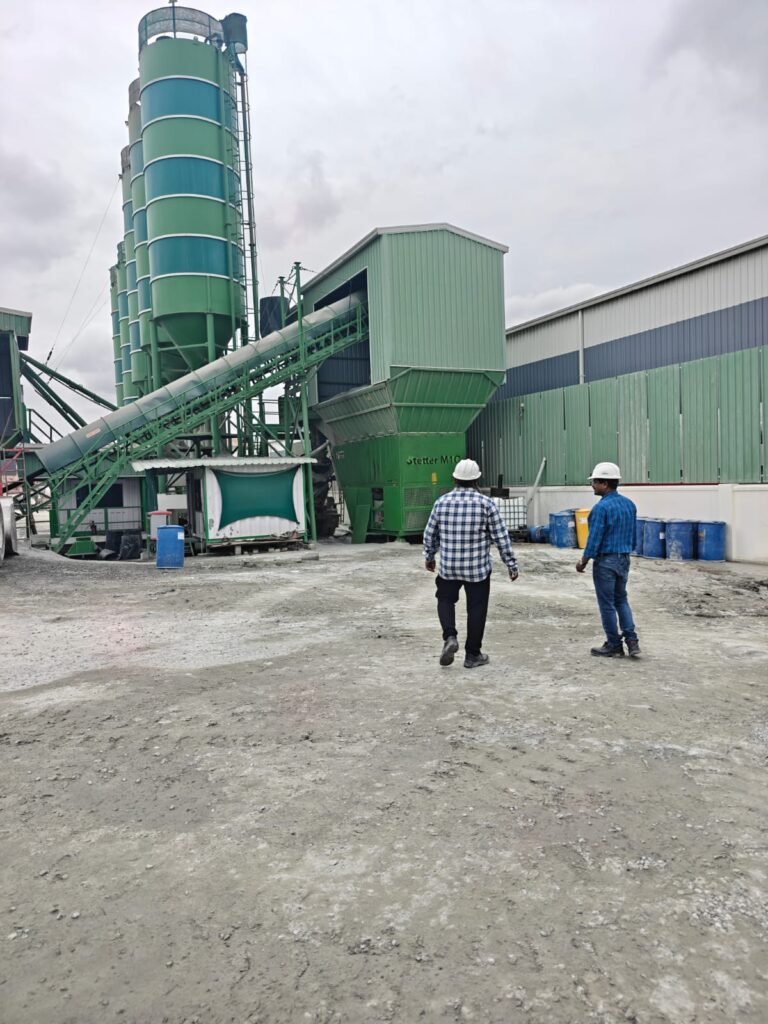
What Is an RMC Plant Audit?
An RMC plant audit is a systematic inspection that verifies whether a batching plant can produce concrete consistently and according to project specifications. During the audit, you inspect the plant, review documents, observe production, and check whether quality control procedures are being followed.
Think of the audit as a health check for the entire plant. Just as a doctor examines different parts of the human body before giving a diagnosis, an auditor checks every important area before deciding whether the plant meets quality requirements.
Why Should You Audit an RMC Plant?
An audit helps you identify problems before they affect construction quality. Moreover, it confirms that the supplier follows approved procedures and maintains reliable equipment.
A well-conducted audit can help you:
- Ensure consistent concrete quality.
- Verify compliance with project requirements.
- Reduce the risk of construction defects.
- Confirm that testing equipment is calibrated.
- Improve confidence in the RMC supplier.
- Identify areas that need corrective action.
Instead of reacting to quality issues later, you can prevent them at the source.
Step 1: Prepare Before Visiting the Plant
A successful audit starts long before you reach the plant. Good preparation saves time and helps you focus on the most critical inspection points.
Before leaving your office, make sure you carry the following items:
| Item | Why You Need It |
|---|---|
| Audit checklist | Guides your inspection and prevents missed items. |
| Safety helmet | Mandatory for plant safety. |
| Reflective safety jacket | Improves visibility in operational areas. |
| Safety shoes | Protect your feet from heavy equipment. |
| Mobile phone or camera | Records observations and evidence. |
| Notebook and pen | Notes findings during the audit. |
| Previous audit report | Helps verify whether earlier observations were closed. |
Pro Tip
Never visit an RMC plant without reviewing the project specifications. Understanding the required concrete grades, approved materials, and client requirements will help you ask better questions during the audit.
Step 2: Meet the Plant In-Charge
Once you arrive, don’t start inspecting equipment immediately. Instead, introduce yourself to the plant manager or QA/QC engineer. Explain the purpose of your visit and request a brief overview of the facility.
This first meeting builds cooperation and helps you gather essential information before starting the inspection.
Ask for the following documents:
- Plant layout
- Approved mix designs
- Laboratory details
- Calibration certificates
- Material approval records
- Daily production capacity
- Organization chart
While discussing these documents, pay attention to how confidently the team answers your questions. A well-organized plant usually has documents readily available and can explain its quality procedures clearly.
Questions You Should Ask
- Which concrete grades do you produce?
- Where do you source cement and aggregates?
- How often do you calibrate your batching system?
- Who performs laboratory testing?
- How do you monitor moisture content in aggregates?
These questions help you understand the plant’s quality management system before you inspect the production area.
Step 3: Walk Around the Plant First
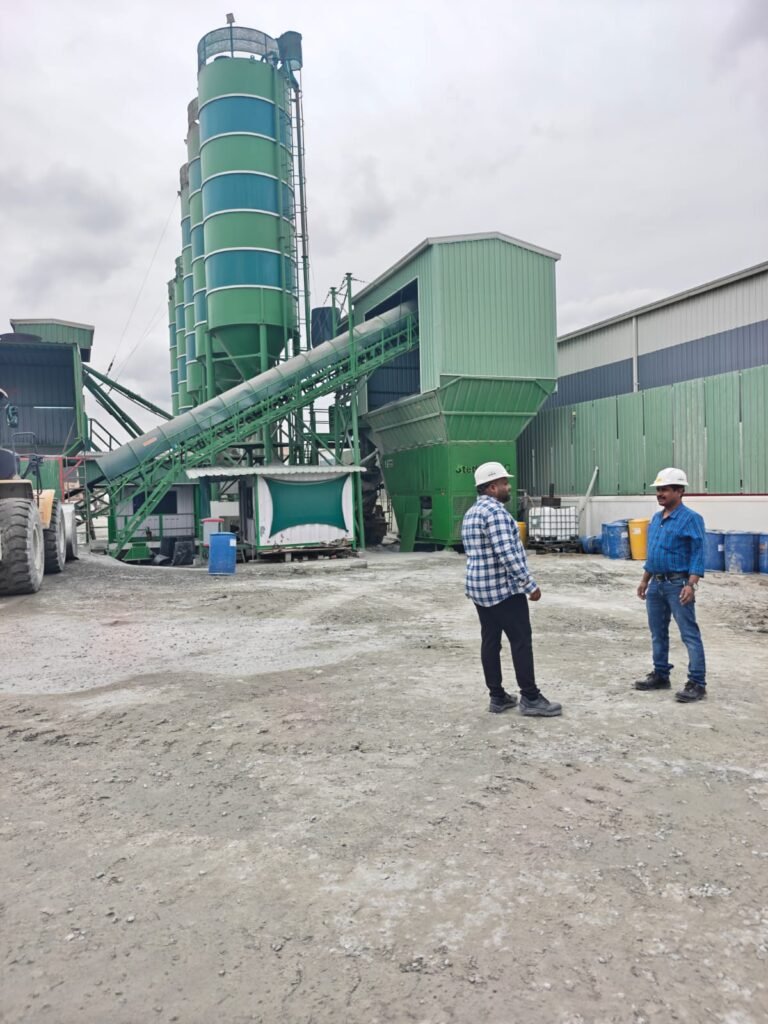
Many beginners make the mistake of opening the checklist and inspecting each item one by one. Instead, take a few minutes to walk around the entire plant before checking specific details.
This initial walk gives you a general impression of the facility.
During your walk, observe:
- Is the plant clean and organized?
- Are access roads in good condition?
- Is water draining properly?
- Do you see excessive dust?
- Are waste materials removed regularly?
- Are safety signs visible?
- Are employees wearing PPE?
Good housekeeping often reflects good management practices. On the other hand, poor housekeeping may indicate weak quality control.
Example
Suppose you notice cement dust covering the batching equipment and aggregate bins. Although this may seem like a housekeeping issue, it can also indicate poor maintenance or ineffective dust collection systems. Therefore, always investigate further before recording your observation.
Step 4: Inspect the Raw Material Storage Area
Raw materials directly influence concrete quality. For this reason, inspecting storage areas should be one of your highest priorities.
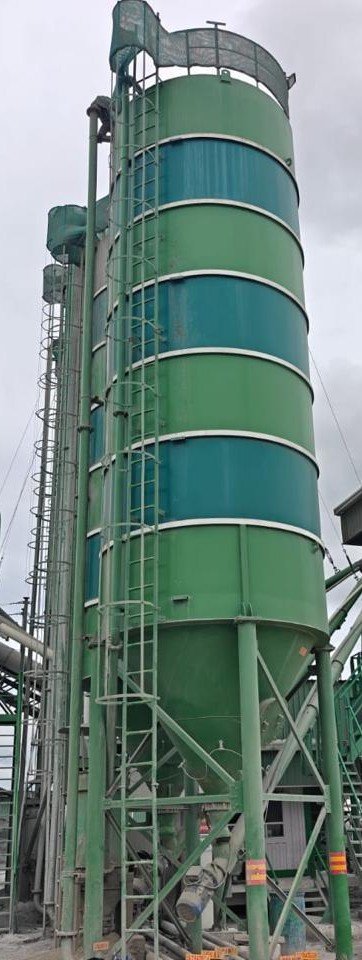
Cement Storage
Start by inspecting the cement silos.
Look for:
- Proper identification labels
- No visible cement leakage
- Functional pressure relief valves
- Working level indicators
- Clean surroundings
Next, ask the QA engineer when the last cement delivery was received. Also, request the manufacturer’s test certificate to verify that the supplied cement meets project requirements.
Common Non-Conformities
- Cement leakage around silo joints
- Missing identification labels
- Damaged pipelines
- Expired test certificates
Aggregate Storage
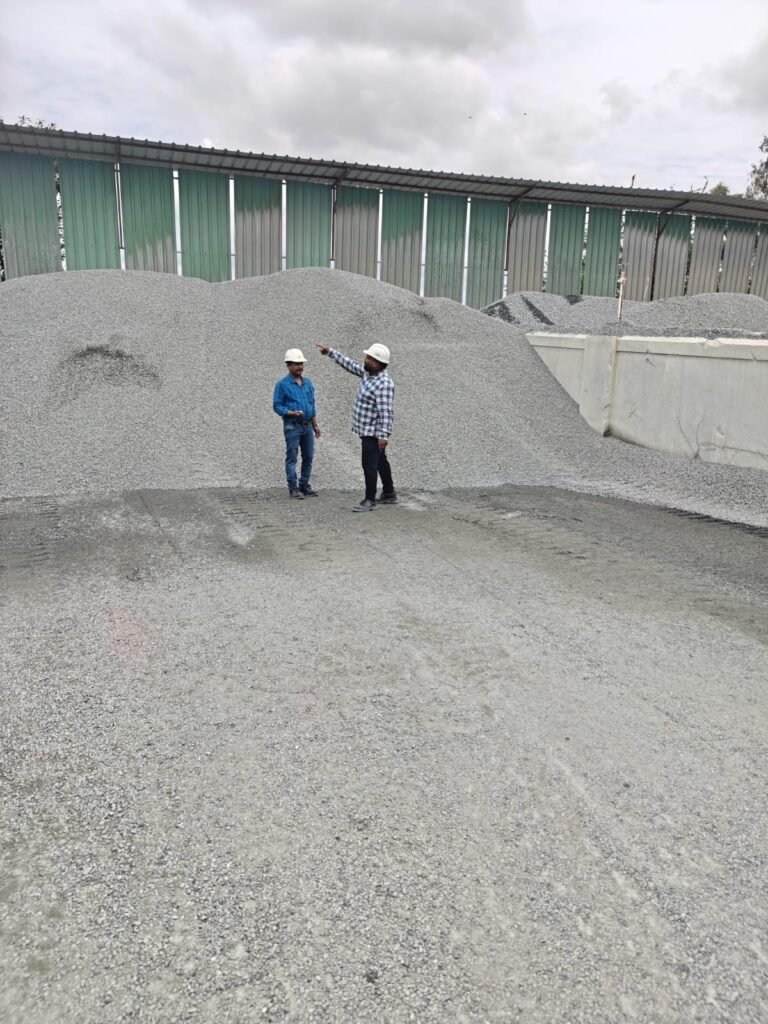
Now move to the aggregate storage yard.
First, check whether different aggregate sizes are stored separately. Mixed aggregates can affect grading and reduce concrete quality.
Next, inspect the storage surface.
Ask yourself:
- Is the material clean?
- Is there mud or standing water?
- Are stockpiles clearly separated?
- Are retaining walls in good condition?
If you notice contamination, record it immediately.
Practical Tip
Stand several meters away from the stockpile before inspecting closely. From a distance, it becomes easier to identify mixed materials and poor segregation.
Fine Aggregate (Sand)
Sand should be free from excessive silt, clay, and organic impurities.
Ask the laboratory technician:
- When was the last silt content test performed?
- How is moisture measured?
- Are daily records maintained?
Then request to see the latest laboratory reports.
Remember, moisture in sand directly affects the water-cement ratio. Therefore, moisture corrections must be applied during batching.
Coarse Aggregate
Inspect coarse aggregates carefully.
Check:
- Proper grading
- Clean appearance
- No excessive dust
- No soft particles
- Separate storage for each size
If two aggregate sizes are mixed together, batching accuracy may suffer. As a result, concrete strength and workability can become inconsistent.
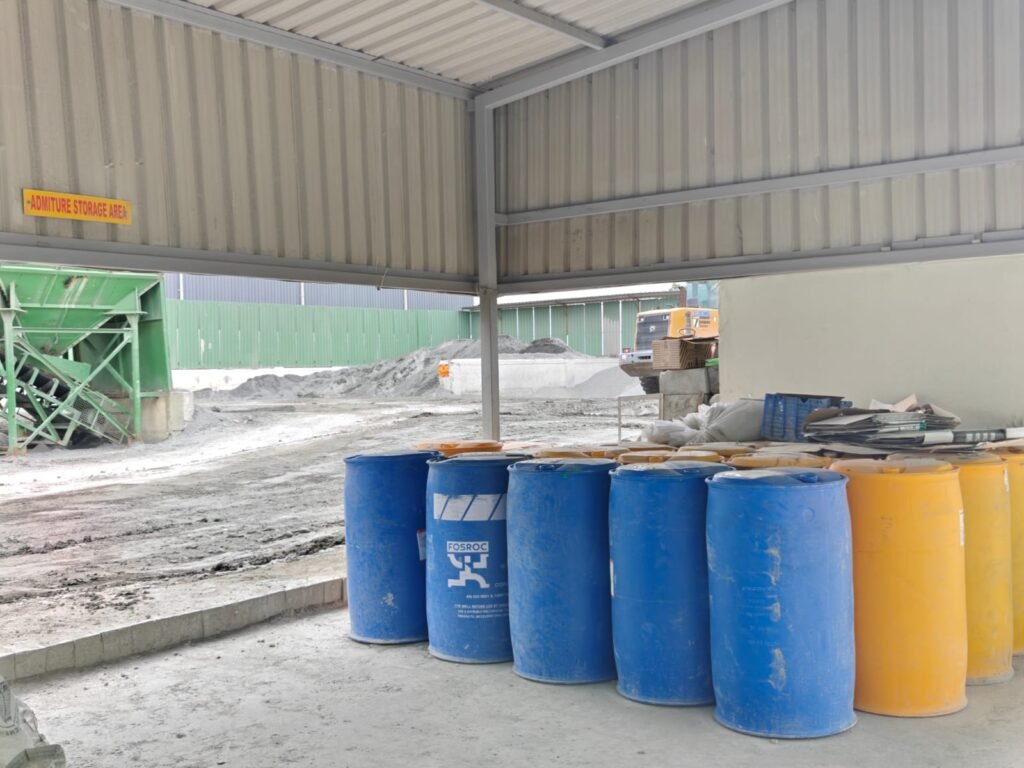
Water and Chemical Admixtures
Finally, inspect the water storage tank and admixture tanks.
Verify that:
- Tanks are clean.
- Labels are clearly visible.
- No leakage is present.
- Admixture containers are protected from direct sunlight.
- Shelf-life records are available.
Always confirm that only approved admixtures are being used.
Audit Checklist Before Leaving the Storage Area
Before moving to the next section, confirm that you have inspected:
✔ Cement silos
✔ Aggregate stockpiles
✔ Sand storage
✔ Water tanks
✔ Admixture tanks
✔ Material identification
✔ Housekeeping
✔ Material test certificates
Step 5: Inspect the Quality Control Laboratory
After checking the raw materials, visit the laboratory. This is where the plant verifies the quality of concrete before it reaches the construction site. A well-equipped laboratory usually indicates a strong quality management system.
Start by introducing yourself to the laboratory technician or QA engineer. Then, ask them to explain the testing process followed by the plant. Listening first will help you understand their workflow before you begin checking equipment.
Now inspect the laboratory for cleanliness, organization, and safety. The work area should be neat, equipment should be arranged properly, and all test samples should be labelled correctly.
Equipment You Should Check
Verify that the following equipment is available and in good working condition:
| Equipment | Purpose |
|---|---|
| Compression Testing Machine (CTM) | Tests cube strength |
| Slump Cone | Measures concrete workability |
| Cube Moulds | Casts concrete specimens |
| Weighing Balance | Measures material accurately |
| Sieves | Checks aggregate grading |
| Oven | Dries samples for testing |
| Moisture Meter | Measures aggregate moisture |
| Thermometer | Records concrete temperature |
Don’t just look at the equipment. Ask whether it is being used regularly and maintained properly.
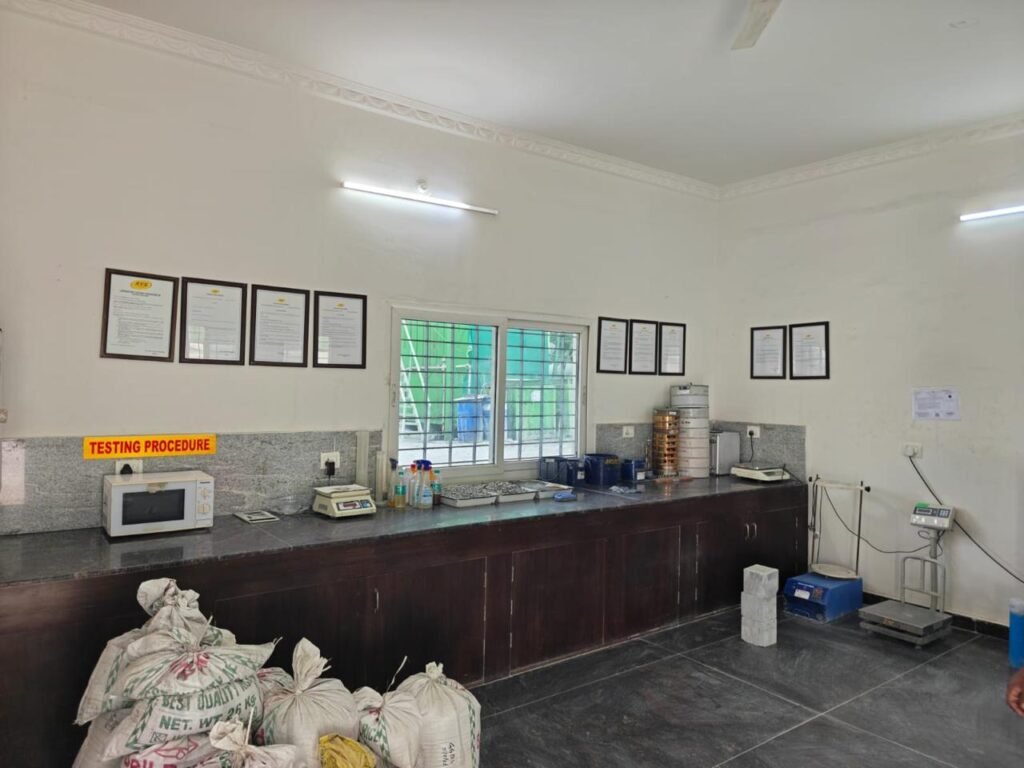
Pro Tip: Equipment that looks clean but has no calibration record should still be treated as a concern.
Step 6: Verify Calibration Certificates
Calibration is one of the most critical parts of an RMC audit. Even the best laboratory cannot produce reliable results if its equipment is not calibrated.
Instead of asking, “Is this machine calibrated?”, ask:
“Can you please show me the latest calibration certificate?”
Next, verify the following details:
- Equipment identification number
- Certificate number
- Calibration date
- Due date
- Name of the calibration agency
- NABL accreditation (where applicable)
Always compare the equipment ID on the machine with the ID mentioned on the certificate. If they do not match, record the observation.
Common Audit Findings
❌ Expired calibration certificate
❌ Missing equipment identification
❌ No calibration schedule
❌ Damaged laboratory equipment
Remember, a single expired calibration certificate can affect the credibility of all quality test results.
Step 7: Observe Live Concrete Production
Now move to the batching plant. This is where theory meets practice.
Ask the plant engineer if you can observe one complete concrete batch from start to finish. Watching the production process helps you verify whether the approved procedures are followed.
Start with the Control Room
The operator should explain:
- Concrete grade being produced
- Approved mix design
- Batch quantity
- Moisture correction
- Water adjustment
- Admixture dosage
Observe the batching software carefully. It should display all materials being weighed automatically.
Watch the Batching Process
During batching, pay attention to each material entering the mixer.
Ask yourself:
- Are the materials weighed automatically?
- Is the batching sequence correct?
- Is moisture correction applied?
- Are any manual adjustments being made?
- Is the batching system functioning smoothly?
Any manual addition of cement or water should be investigated immediately.
Check the Mixer
Next, inspect the mixer.
Verify:
- Mixing time
- Mixer cleanliness
- Uniform mixing
- No hardened concrete buildup
If the mixer contains hardened concrete, mixing efficiency may reduce over time.
Observe the Slump Test
After the concrete is produced, the laboratory technician should perform a slump test.
Watch the complete procedure.
Check whether:
- The slump cone is clean.
- The concrete is filled in three layers.
- Each layer is tamped correctly.
- The slump is measured properly.
- Results are recorded immediately.
Never accept verbal confirmation. Always verify the recorded value.
Observe Cube Casting
Cube casting is equally important because it confirms the compressive strength of concrete.
Check whether:
- Cube moulds are clean.
- Moulds are lightly oiled.
- Concrete is compacted properly.
- Cubes are labelled correctly.
- Casting date is recorded.
Incorrect cube identification can make strength results meaningless.
Step 8: Verify Quality Documents
After observing production, return to the office and review the quality records.
A professionally managed plant should maintain complete and updated documentation.
Request the following records:
| Document | Why It Matters |
|---|---|
| Approved Mix Designs | Confirms production follows approved proportions |
| Cement Test Reports | Verifies material quality |
| Aggregate Test Reports | Checks grading and quality |
| Admixture Certificates | Confirms approved products |
| Cube Register | Tracks compressive strength |
| Slump Register | Records workability |
| Daily Production Register | Tracks production history |
| Calibration Register | Monitors equipment status |
| Complaint Register | Reviews customer issues |
Don’t rush through the documents. Compare dates, signatures, and test frequencies.
For example, if the cube register shows daily testing but only a few test reports are available, ask the QA engineer for clarification.
Consistency between records is just as important as the records themselves.
Step 9: Record Your Observations
Many beginners lose marks because they write vague observations.
Avoid writing statements like:
❌ Laboratory not good.
Instead, write clear and measurable observations.
For example:
✅ The Compression Testing Machine calibration certificate expired on 15 June 2026 and requires immediate renewal.
Another example:
❌ Poor housekeeping.
Better observation:
✅ Loose cement bags were stored directly on the floor without wooden pallets, increasing the risk of moisture absorption.
Specific observations help the plant understand the problem and implement corrective actions quickly.
Step 10: Classify Non-Conformities
Not every observation has the same level of importance. Therefore, classify each finding based on its potential impact.
| Classification | Example |
|---|---|
| Critical | Expired batching system calibration |
| Major | No approved mix design available |
| Minor | Missing identification board |
| Opportunity for Improvement (OFI) | Better document filing system |
This classification helps management prioritize corrective actions.
Common Mistakes Beginners Should Avoid
Even experienced auditors make mistakes. However, beginners can avoid many problems by following a few simple practices.
Here are some common mistakes:
- Starting the audit without a checklist.
- Ignoring housekeeping conditions.
- Accepting verbal explanations without evidence.
- Forgetting to verify calibration dates.
- Not observing live concrete production.
- Skipping laboratory records.
- Writing unclear observations.
- Leaving the plant without discussing findings.
- Forgetting to take photographs.
- Failing to verify corrective actions from previous audits.
Avoiding these mistakes will improve both your confidence and the quality of your audit.
Before You Leave the Plant
Before completing the audit, meet the plant in-charge once again.
Discuss:
- Positive observations
- Major non-conformities
- Minor observations
- Recommended corrective actions
- Expected completion dates
This discussion ensures that there are no misunderstandings after the audit.
Finally, thank the plant team for their cooperation and collect any remaining documents required for your report.
Final Audit Checklist
Before leaving, make sure you have completed the following:
✅ Plant infrastructure inspection
✅ Raw material verification
✅ Laboratory inspection
✅ Equipment calibration check
✅ Slump test verification
✅ Cube casting verification
✅ Document review
✅ Observation recording
✅ Discussion with plant management
If every item is complete, your field audit is finished successfully.
Conclusion
An RMC plant audit is much more than filling out a checklist. It is a systematic process that helps ensure every batch of concrete meets the required quality standards. By following the steps in this guide, you can inspect the plant with confidence, identify potential risks, and provide meaningful recommendations for improvement.
As you gain experience, you’ll develop a sharper eye for quality. Until then, remember one simple rule: observe carefully, ask questions, verify every record, and never rely on assumptions. A disciplined approach will make you a more effective QA/QC engineer and help deliver durable, high-quality construction projects.
Frequently Asked Questions (FAQs)
1. How long does an RMC plant audit usually take?
A complete audit typically takes 3–6 hours, depending on the plant size and the scope of the inspection.
2. Which IS Codes should I know before conducting an RMC audit?
You should be familiar with IS 4926 (Ready Mixed Concrete), IS 456 (Plain and Reinforced Concrete), IS 10262:2019 (Concrete Mix Proportioning), IS 383 (Aggregates), and IS 9103 (Concrete Admixtures).
3. What is the most important part of an RMC plant audit?
There isn’t a single most important part. Material quality, equipment calibration, laboratory testing, production control, and documentation all work together to ensure consistent concrete quality.
4. Can a new QA/QC engineer conduct an RMC audit?
Yes. A beginner can perform an effective audit by using a structured checklist, understanding the inspection sequence, and verifying records carefully. Guidance from a senior engineer during the first few audits is also valuable.
5. Should I take photographs during the audit?
Yes. Photographs provide objective evidence of observations, support your audit report, and help track corrective actions during future audits.
Ready to Simplify Your RMC Audits?
At QUALCONN, we create practical QA/QC resources for construction professionals, including audit checklists, inspection formats, ITPs, quality templates, and digital tools. Explore our growing library to save time, improve consistency, and conduct professional-quality inspections with confidence.